How to access Rescue mode (runlevel 1) in Linux

I frequently find need to perform maintenance on the filesystem of one of my dozen or so physical computers. For the most part, many of those tasks, such as increasing the size of a logical volume (LV) when it fills to 80% or so of its capacity. Increasing the size of a logical volume can be done while the filesystem is on-line and active, which is pretty cool when you think about it. Other tasks, like reducing the size of most logical volumes, definitely require the system to be running the rescue.target, formerly called single-user mode or runlevel 1.
This morning I needed to reduce the size of my /tmp filesystem as I had increased it substantially to do some testing. Because the filesystem couldn’t be reduced while on-line, I entered Rescue mode to perform this action. Runlevel 1 is the rescue.target in systemd.
There are two methods you can use to enter the rescue.target. You can reboot the host, or you can use the systemctl command to change the target from the current target to the rescue.target.
You can read about systemd, startup, and targets in the article, systemd — #2: Understanding Linux startup with systemd. Note that I don’t use Emergency mode, which is different from Rescue mode in that filesystems aren’t mounted. That means that most commands aren’t available because the filesystem that contains them, /usr, is not mounted. This means you can’t mount and unmount filesystems, including /usr. We must use Rescue mode in order to have access to the utilities required to perform any administrative tasks.
Using the command line
This method of accessing Rescue mode is a bit easier than rebooting and is the method I usually use. Simply enter the command in Figure 1 and enter the root password when prompted.
# systemctl isolate rescue.target
<SNIP>
You are in rescue mode. After logging in, type "journalctl -xb" to view
system logs, systemctl reboot" to reboot, or "exit"
to continue bootup.
Give root password for maintenance
(or press Control-D to continue): <Enter root password>

#
Figure 1: Login with the root password to enter maintenance mode, also known as rescue.target.
After entering the root password you can enter commands to perform the task at hand. For me, that was to umount the /tmp filesystem so I could reduce its size, reduce the size of the logical volume that contains that filesystem, and then to return to the graphical.target.
Rebooting
This option is a bit more complicated, but not very much. There are times when the reboot is needed and this method works just as well when you know how.
First, initiate the boot or reboot as the case may be. When the GRUB menu is displayed, type e to enter Edit mode. This allows you to edit the Linux Kernel command line. While that sounds dangerous, and it can be, if you follow these simple directions, it’s not.
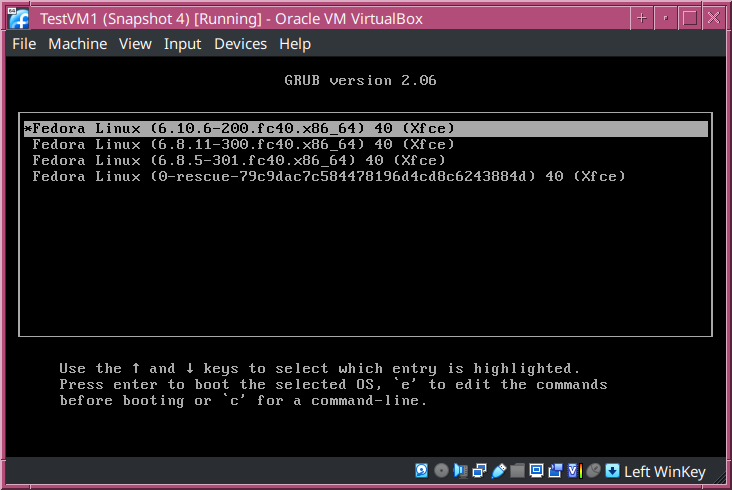
When the GRUB menu is displayed, press E to enter edit mode for the default kernel, which is typically the most recent one. Figure 2 shows the GRUB menu with the default kernel selected. You won’t have more than a few seconds, usually 3 for Fedora, to press the E key. You can stop the countdown timer by moving the selector bar with the arrow keys, or by pressing any other key that doesn’t perform a function. Don’t press the Enter key or it will just continue to boot.
In Figure 3, we see the default kernel boot configuration in GRUB. Edit the “linux…” line to add a “1” to the end of the line. The red arrow shows the location where I added “1.” After making the edit, press the F10 key to boot. The “1” you added causes GRUB to boot Linux into the rescue.target.
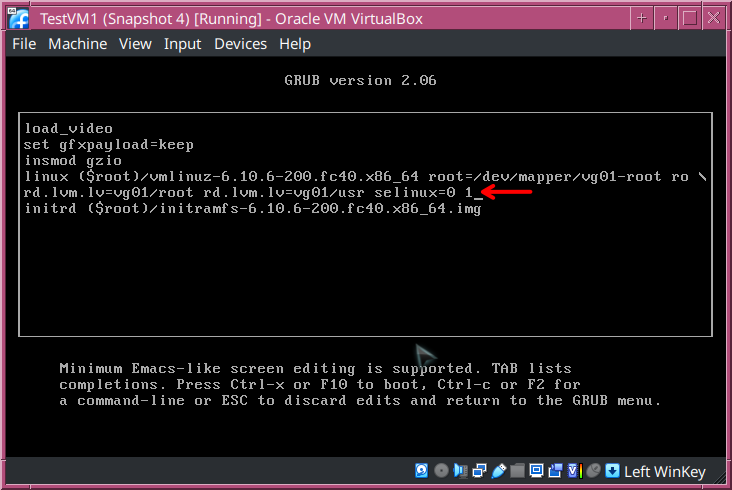
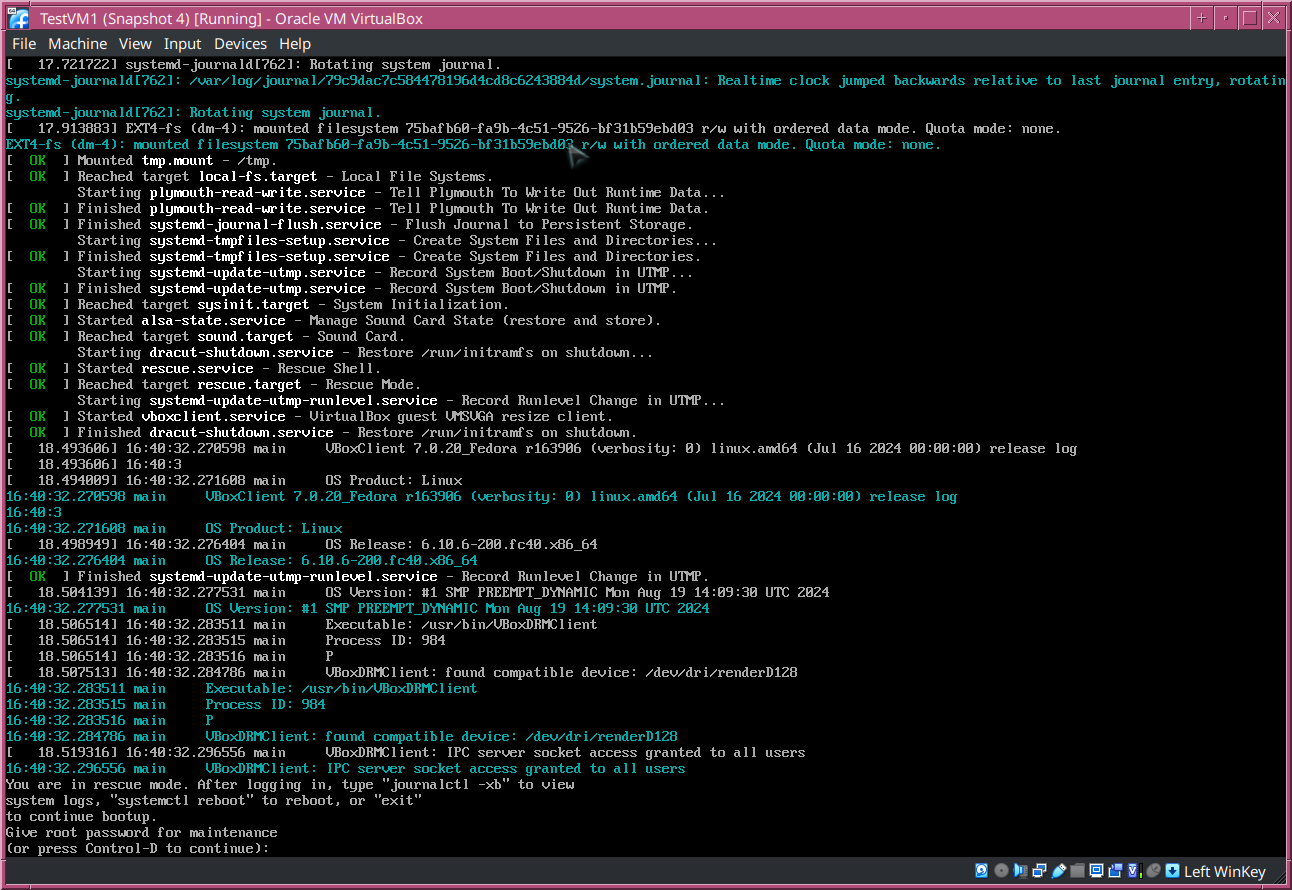
Figure 4 shows the password prompt at the bottom of the screen. Enter the root password to login.
After entering the root password, you’ll be at a root command prompt and ready to perform your administrative tasks.
There are still some limitations in this rescue.target. For example, you won’t be able to umount some filesystems, like /usr, and /var. If you need to rescue a system that can’t be umounted, you should use the Live System USB thumb drive I describe in my article, How I hacked my Linux system with a Live USB device.